

import json
import boto3
import os
import datetime
from botocore.exceptions import ClientError

# Pinpoint Project Id
application_id = "4fcac97e77254e918fa8f9d919afde1e"

region = os.environ['AWS_REGION']
client = boto3.client('pinpoint',region_name=region)

# Pinpoint Project Id
def get_segment_id(segment_name):
    try:
        response = client.get_segments(
            ApplicationId=application_id
        )
        segment_list = response['SegmentsResponse']['Item']
        for one in segment_list:
            if one['Name'] == segment_name:
                segment_id = one['Id']
    except ClientError as e:
        print(e.response['Error']['Message'])
    else:
        print(segment_id)
        # print(json.dumps(response))
    return segment_id

def create_campaign(title, message, segment_id):
    print(segment_id)
    try:
        response = client.create_campaign(
            ApplicationId=application_id,
            WriteCampaignRequest={
                'MessageConfiguration': {
                    'DefaultMessage': {
                        'Action': 'OPEN_APP',
                        'Body': message,
                        'Title': title
                    },
                },
                'Name': title,
                'Description': "Campaign Description",
                'SegmentId': segment_id,
                'Schedule': {
                    'StartTime': "IMMEDIATE"
                    # 'Frequency': 'ONCE',
                    # 'StartTime': datetime.datetime.utcnow().replace(tzinfo=datetime.timezone.utc).isoformat()
                }
            }
        )
    except ClientError as e:
        print(e.response['Error']['Message'])
    else:
        print (json.dumps(response))

def lambda_handler(event, context):
    # Query parameters
    title = event["title"]
    message = event["message"]
    segment = event["segment"]

    segment_id = get_segment_id(segment)
    create_campaign(title, message, segment_id)

    return {
        'statusCode': 200,
        'body': json.dumps("")
    }
|
매개 변수중 Schedule에 있는 StartTime에 따라서 즉시 보낼 것인지, 특정 시간에 보낼 것인지 정해야 합니다.
Python boto3에서 제공하는 기능은 다음 문서에서 확인할 수 있습니다: https://boto3.amazonaws.com/v1/documentation/api/latest/reference/services/pinpoint.html
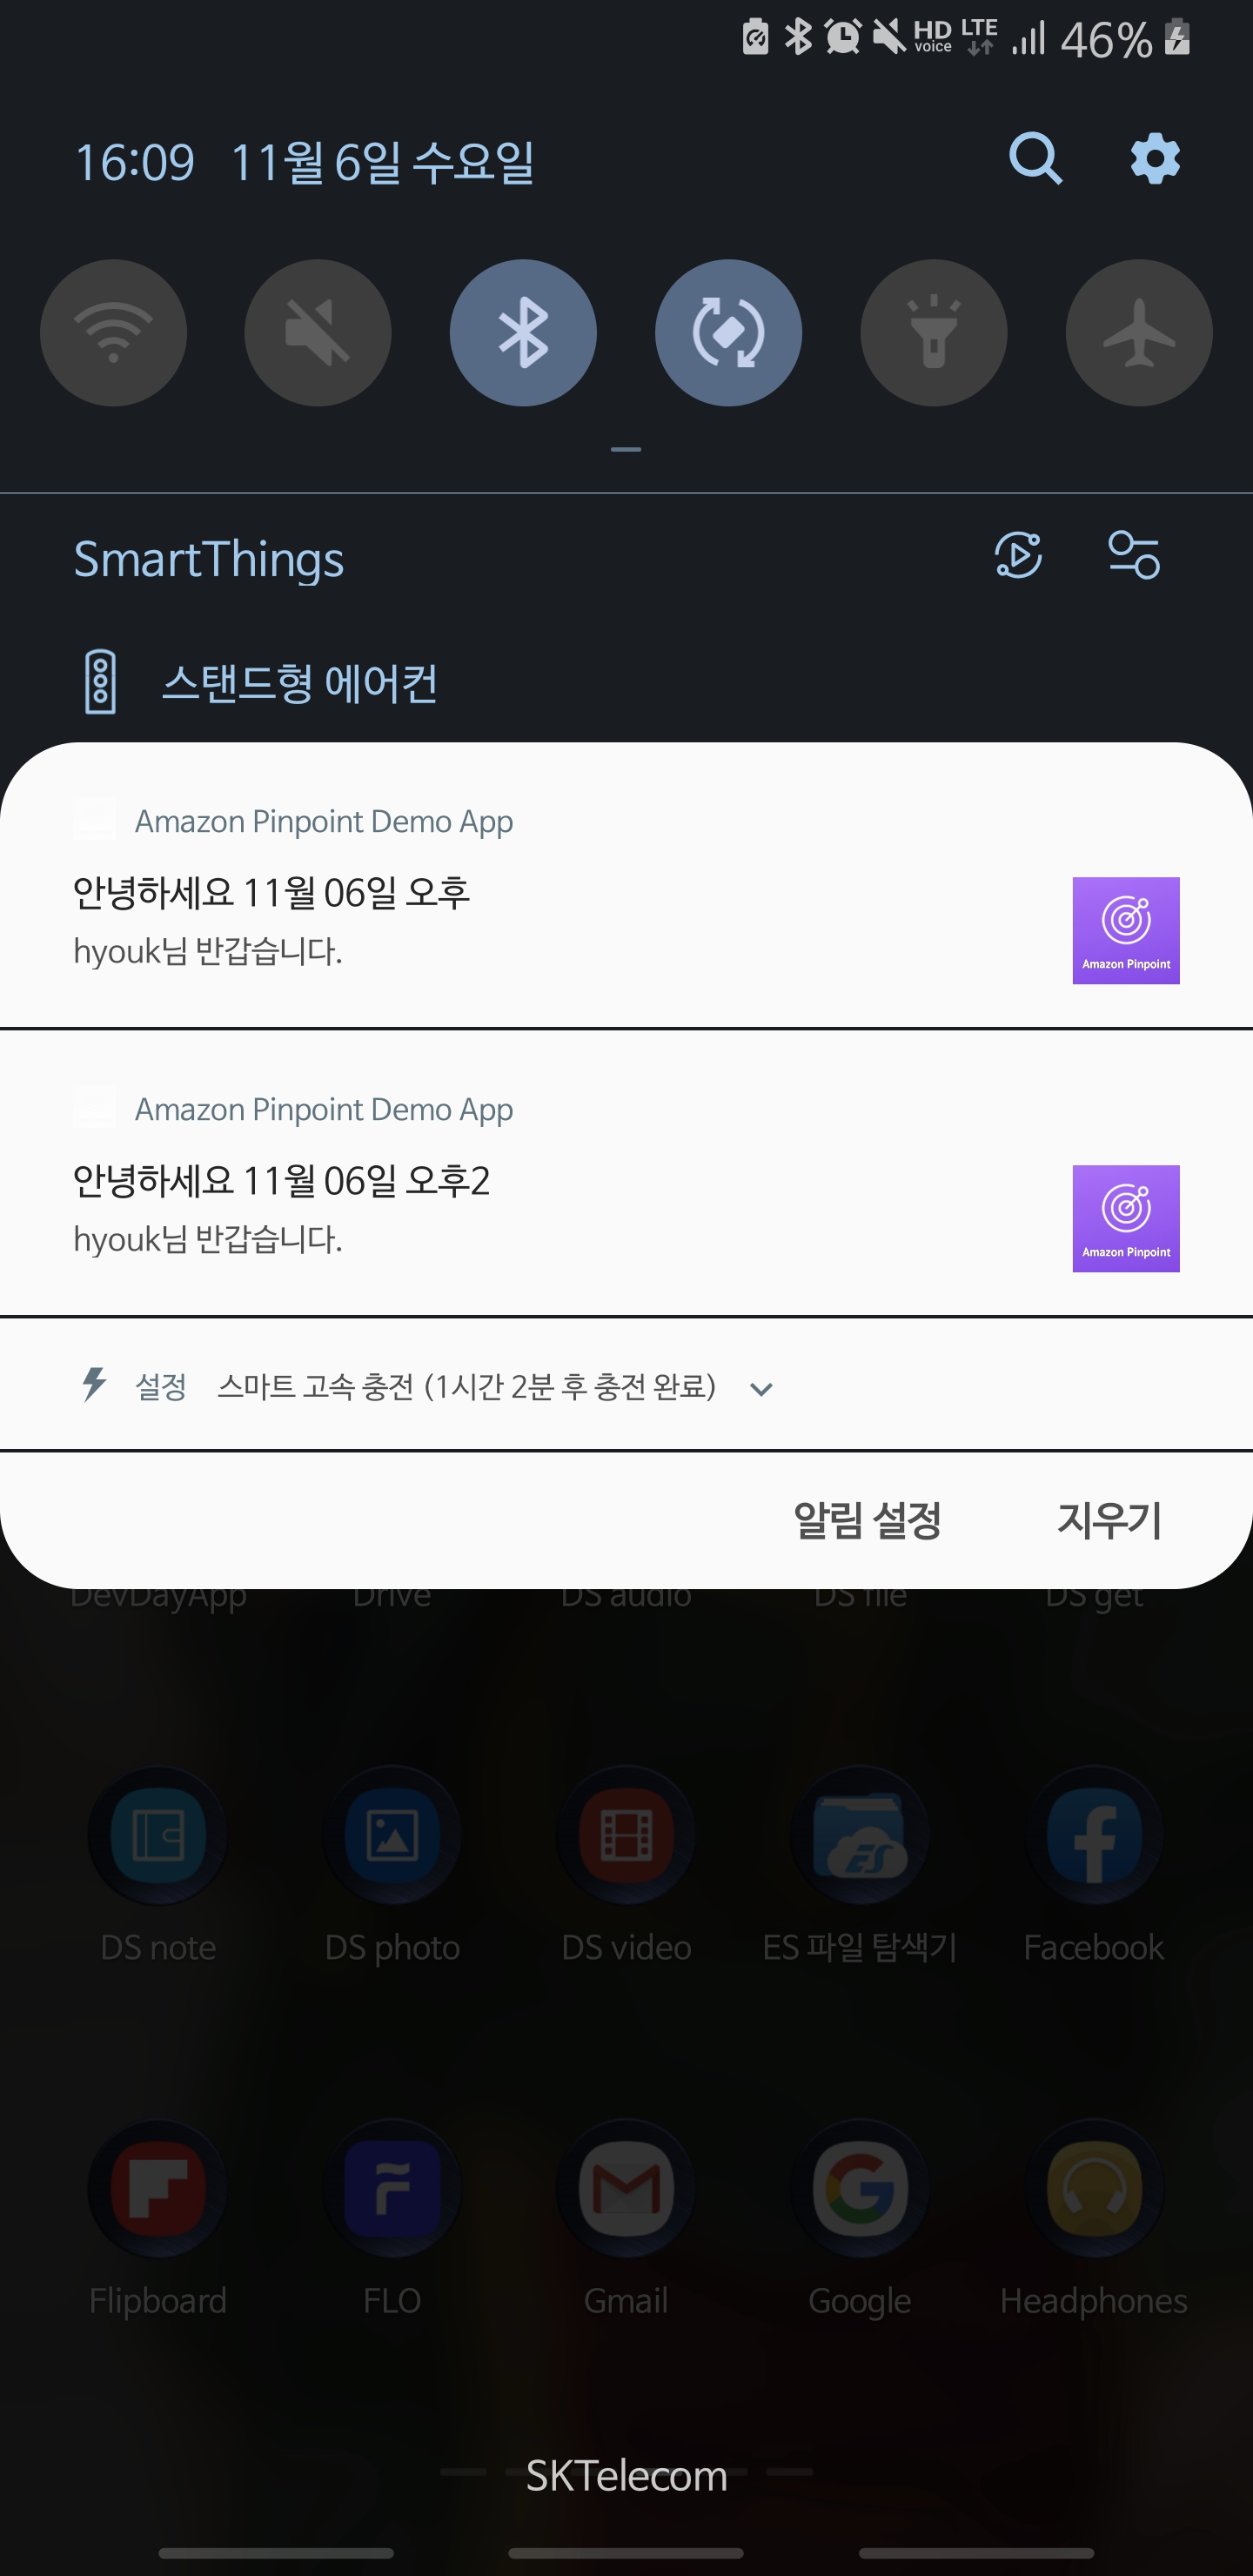
{
  "segment": "cart",
  "title": "안녕하세요 11월 06일 오후2",
  "message": "{{User.UserId}}님 반갑습니다."
} |
하단의 {account-id}는 본인 account-id(12자리 숫자)로 치환해야 하며, 아래는 테스트를 위해서 임의로 간단하게 구성한 예입니다.
{
    "Version": "2012-10-17",
    "Statement": [
        {
            "Sid": "VisualEditor0",
            "Effect": "Allow",
            "Action": [
                "logs:CreateLogStream",
                "logs:PutLogEvents"
            ],
            "Resource": "arn:aws:logs:us-east-1:{account-id}:log-group:/aws/lambda/PinpointPushTest:*"
        },
        {
            "Sid": "VisualEditor1",
            "Effect": "Allow",
            "Action": "mobiletargeting:*",
            "Resource": "*"
        },
        {
            "Sid": "VisualEditor2",
            "Effect": "Allow",
            "Action": "logs:CreateLogGroup",
            "Resource": "arn:aws:logs:us-east-1:{account-id}:*"
        }
    ]
} |
1개는 시간대를 지정하여 발송하고, 하나는 즉시 발송하였습니다.
마케팅을 위한 워크플로우를 시각화 도구를 이용해서 쉽게 구성할 수 있습니다: https://aws.amazon.com/ko/pinpoint/features/engagement-management/journeys/

| 채널 | 트랜잭션 메시지 요금 | 캠페인 또는 Journey 기반 메시지 요금 (MTA 요금 별도 청구) |
|---|---|---|
| 이메일 | $1 / 10,000개 | $1 / 10,000개 |
| 푸시 알림 | $1 / 1,000,000개 | $1 / 1,000,000개 |
| SMS | 한국 국가별 상이, SMS 요금 도구를 참조. | 한국 |
그 외 채널로의 메시지 전송 방법은 Lambda를 이용합니다: https://docs.aws.amazon.com/pinpoint/latest/developerguide/channels-custom.html
MTA 요금 추가 적용: 캠페인 기반 메시지의 경우, 최초 MTA 5,000개 엔드포인트에 대해서는 $0, 이후 1,000개당 1.20 USD 과금 (하단 월 사용자 정보 관리 참고)
1,000개 기준 1.2원 (1,172.59원/$1 기준)
매월 수집하는 처음 100,000,000개의 이벤트에 대해 0 USD, 그 후 수집하는 이벤트에 대해 이벤트당 0.000001 USD를 지불합니다. → 1,172.59 = 0.0012원
AWS Mobile SDK를 사용하여 애플리케이션 사용 데이터를 수집하는 경우, 매월 수집하는 애플리케이션 이벤트 수에 따라 요금이 부과됩니다.
애플리케이션 이벤트는 캠페인 이벤트(푸시 알림의 링크 클릭 등)와 모바일 앱을 사용할 때 기록되는 이벤트(앱 열기 등)를 포함합니다.
활성화된 타겟 Audience 1 기준 = 1.41원 (1,172.59원/$1 기준)
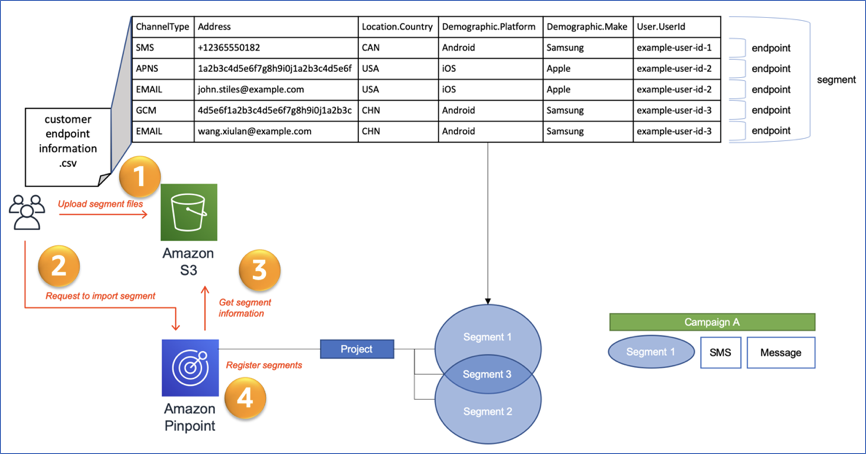
엔드포인트는 개별 고객의 메시징 대상으로, 이메일 주소, 휴대폰 번호 또는 디바이스 식별자를 예로 들 수 있습니다. (User.UserId 기준 최대 10개의 Endpoint를 등록 할 수 있습니다.)
30일 기간 동안 접촉한 엔드포인트 총수를 월별 목표 대상(MTA)이라고 합니다. 캠페인 메시지를 발송할 때는 다음 요금을 지불합니다.
천 만개 이상일 경우 프라이빗 요금 상의
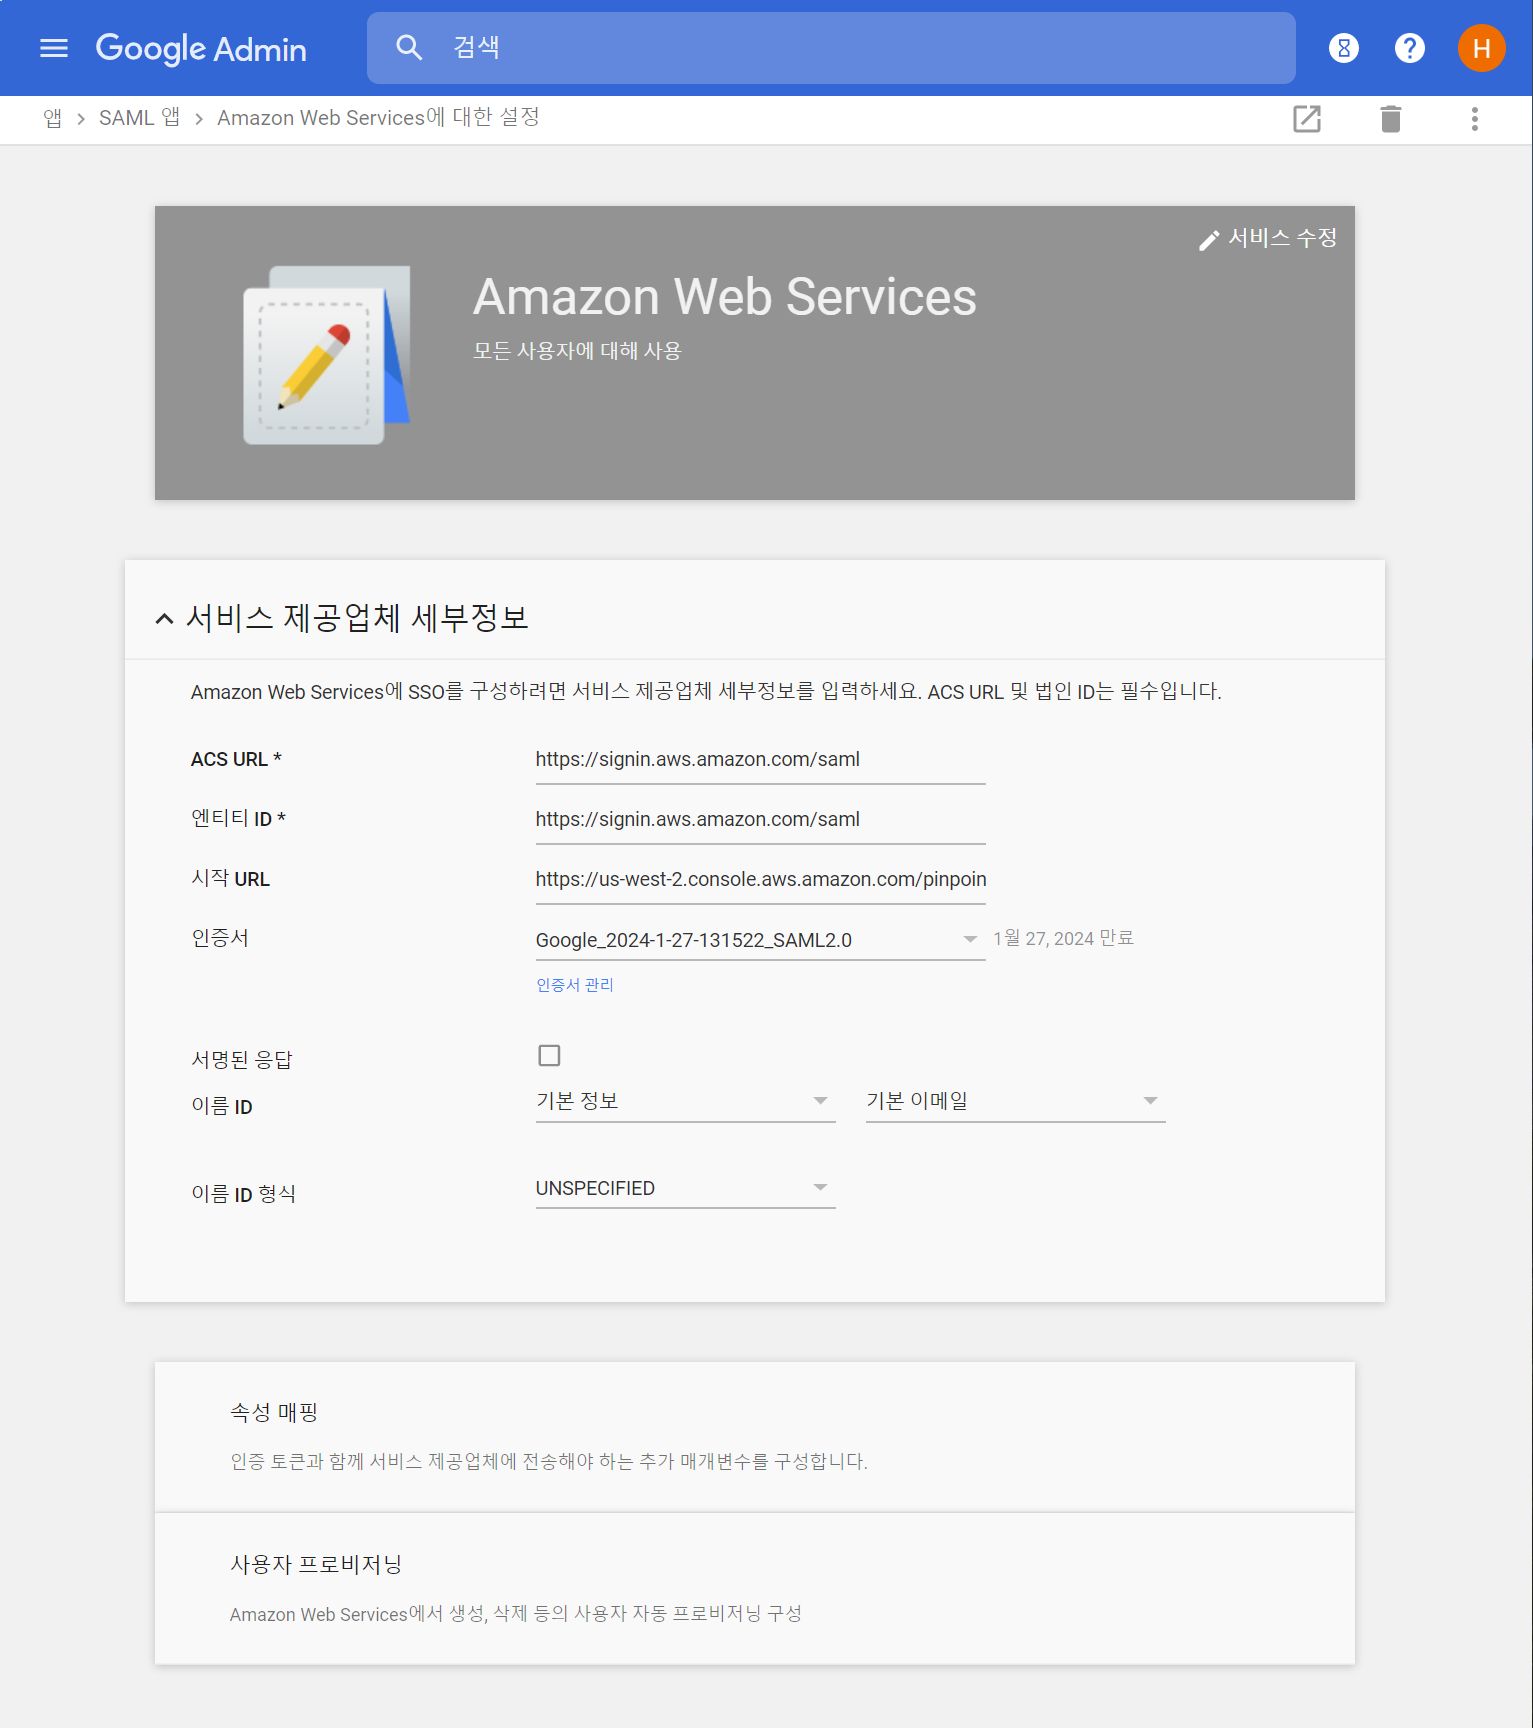
Login 하면 바로 AWS Pinpoint 메시지 보내는 화면으로 시작하기: 로그인 직후 시작 URL에 해당 캠페인으로 URL 구성

사례 소개: https://aws.amazon.com/ko/solutions/case-studies/hyundai-departmentstore/
640만 가입자, 일 App 사용자 10만, 월 기준 40만 (실제는 40만 + 인당 Device 개수(App이 설치된 경우)) - 2019년 4월 Summit 기준
화면 목업아키텍처 다이어그램직접 메시지 보내는 UI 구축 예
sample: https://github.com/aws-samples/amazon-quicksight-embedding-sample 구성요소Front-end: SPA로 MSA 서버리스 기반 (프레임워크는 React) Back-end: 메시징 전송(Push App Notification), 메시지 템플릿 저장 및 불러오기, Campaign 관리, Segment 관리 BI(Dashboard): Embedding Quicksight |