...
VPC 생성 작업이 진행되고, 아래와 같이 새로운 VPC가 생성됩니다. 해당 VPC ID 를 사용하므로 메모장에 복사 해 놓습니다.

AWS Cloud9 시작하기
...
다음과 같이 API가 배포되는 것을 볼 수 있습니다. Endpoint URL이 생성됩니다.

테스트
배포된 API Endpoint URL이 정상 동작이 되는지 확인해 봅시다. 배포된 URL을 복사해서 웹 브라우저 주소창에 넣고 확인합니다. (본인의 프로젝트에서 생성된 URL을 이용하여 테스트 하세요.)
https://8cqxe1wr4bvp8tpwdmd4.execute-api.ap-northeast-2.amazonaws.com/prod/


호출에 대한 정당한 200 OK 메시지를 받는 것을 알 수 있습니다. 사용 방법에 맞춰서 한 번 호출해 봅시다.
...
아마존닷컴에 접속할 수 있는 URL을 만들어 보겠습니다. (본인의 프로젝트에서 생성된 URL을 이용하여 테스트 하세요.)
https://8cqxe1wr4bvp8tpwdmd4.execute-api.ap-northeast-2.amazonaws.com/prod/?targetUrl=https://www.amazon.com


생성된 URL을 입력할 경우, 정상적으로 Redirect 되는지 확인해 봅시다. (본인의 프로젝트에서 생성된 URL을 이용하여 테스트 하세요.)
https://8cqxe1wr4bvp8tpwdmd4.execute-api.ap-northeast-2.amazonaws.com/prod/c12778d97c9b02b8
잘 동작하는 것을 볼 수 있습니다.
미션 2. 부하 테스트 및 모니터링 대쉬보드 작성
...
| 코드 블럭 | ||||||
|---|---|---|---|---|---|---|
| ||||||
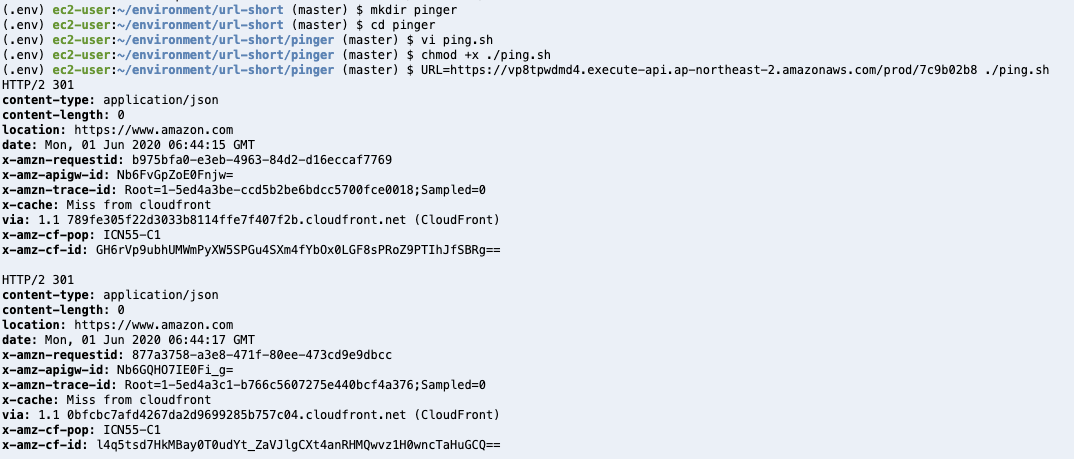
URL=https://8cqxe1wr4bvp8tpwdmd4.execute-api.ap-northeast-2.amazonaws.com/prod/c12778d97c9b02b8 ./ping.sh |
만약 서브도메인 기반으로 api를 만들었다면 아래와 같은 형태로 만들 수 있습니다. (아래의 URL을 사용하지 않고, 본인이 생성한 Custom domain url을 사용합니다.)
...
테스트를 하면 아래와 같이 1초마다 갱신되는 화면을 URL 정보가 리다이렉트 되는 것을 볼 수 있습니다.
트래픽 생성용 Docker 이미지 작성
...
| 코드 블럭 | ||||||
|---|---|---|---|---|---|---|
| ||||||
docker build -t pinger . |

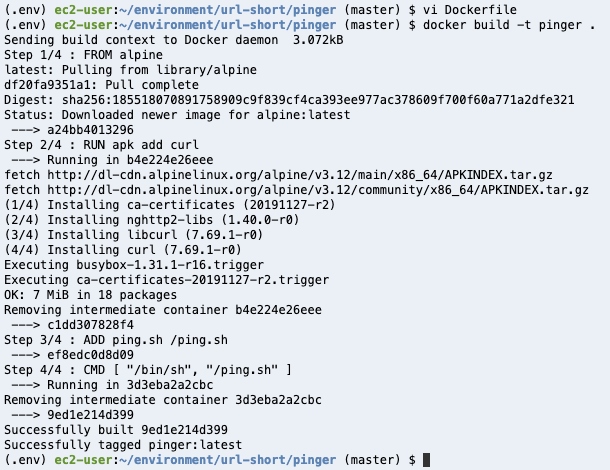
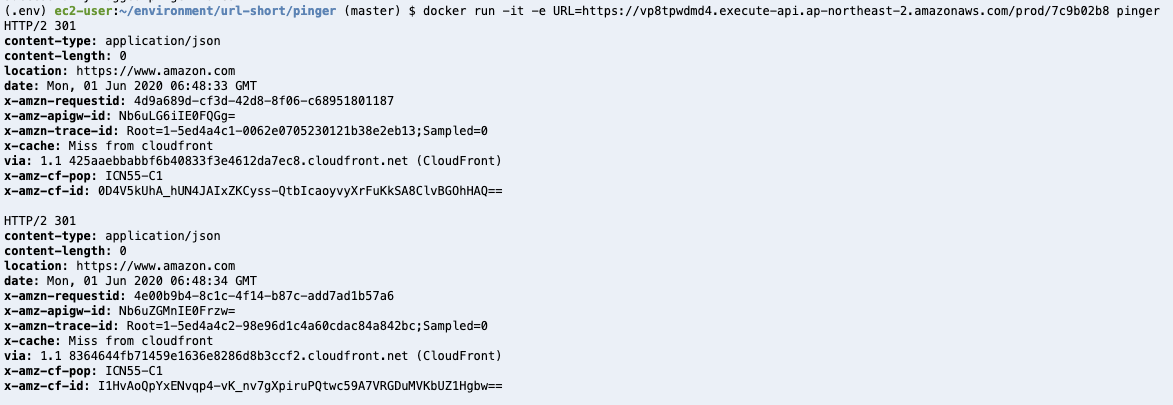
이미지를 실행합니다. 이 작은 컨테이너는 매 초마다 단일 트랜잭션을 수행합니다.
| 코드 블럭 | ||||||
|---|---|---|---|---|---|---|
| ||||||
docker run -it -e URL=https://cdk.awsdemo.kr/715a930bvp8tpwdmd4.execute-api.ap-northeast-2.amazonaws.com/prod/7c9b02b8 pinger |

CDK를 이용한 Fargate 배포 설정
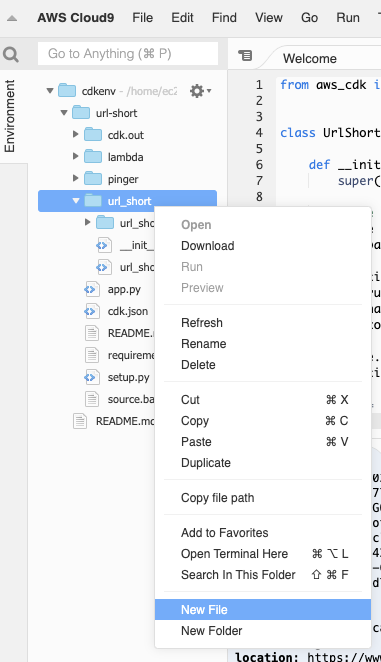
이제 cdk를 이용해서 Fargate에 배포해 봅시다. 새로운 파일을 url_short 폴더에 traffic.py 파일을 생성하고 아래와 같이 코드를 작성합니다.

| 코드 블럭 | ||||||||
|---|---|---|---|---|---|---|---|---|
| ||||||||
from aws_cdk.core import Construct
from aws_cdk import aws_ecs, aws_ec2


# a user-defined construct
# just a class the inherits from the core.Construct base class
class Traffic(Construct):
    """
    An HTTP traffic generator.
    Hits a specified URL at some TPS.
    """

    def __init__(self, scope: Construct, id: str, *, vpc: aws_ec2.IVpc, url: str, tps: int):
        """
        Defines an instance of the traffic generator.
        :param scope: construct scope
        :param id:    construct id
        :param vpc:   the VPC in which to host the traffic generator
        :param url:   the URL to hit
        :param tps:   the number of transactions per second
        """
        super().__init__(scope, id)

        # define an ECS cluster hosted within the requested VPC
        cluster = aws_ecs.Cluster(self, 'cluster', vpc=vpc)

        # define our task definition with a single container
        # the image is built & published from a local asset directory
        task_definition = aws_ecs.FargateTaskDefinition(self, 'PingTask')
        task_definition.add_container('Pinger', image=aws_ecs.ContainerImage.from_asset("pinger"), environment={'URL': url})

        # define our fargate service. TPS determines how many instances we
        # want from our task (each task produces a single TPS)
aws_ecs.FargateService(self, 'service', cluster=cluster, task_definition=task_definition, desired_count=tps) |
...
기존 url_short_stack.py 파일을 아래와 같이 수정합니다.
기존 소스에서 변경되는 부분이 있으니 주의해 주세요: super().__init__(scope, id, env=AWS_ENV, **kwargs)
| 코드 블럭 | ||||||||
|---|---|---|---|---|---|---|---|---|
| ||||||||
from aws_cdk import core, aws_dynamodb, aws_lambda, aws_apigateway, aws_ec2
import os
from traffic import Traffic

# we need default values here since aws-cdk-examples build synthesizes the app
ACCOUNT= os.environ['CDK_DEFAULT_ACCOUNT']
REGION = os.environ['CDK_DEFAULT_REGION']
VPC_ID = os.environ.get('TESTENV_VPC_ID', 'vpc-0e3593e52a414954907aa21d32b2df894f')
AWS_ENV = core.Environment(account=ACCOUNT, region=REGION)

class UrlShortStack(core.Stack):

    def __init__(self, scope: core.Construct, id: str, **kwargs) -> None:
        super().__init__(scope, id, env=AWS_ENV, **kwargs)

        # The code that defines your stack goes here
        table = aws_dynamodb.Table(self, "mapping",
            partition_key = aws_dynamodb.Attribute(name="id",type=aws_dynamodb.AttributeType.STRING))

        function = aws_lambda.Function(self, "backend",
            runtime=aws_lambda.Runtime.PYTHON_3_7,
            handler="handler.main",
            code=aws_lambda.Code.asset("./lambda"))

        table.grant_read_write_data(function)
        function.add_environment("TABLE_NAME", table.table_name)

        api = aws_apigateway.LambdaRestApi(self, "api", handler=function)


class TrafficStack(core.Stack):

    def __init__(self, scope: core.Construct, id: str, **kwargs) -> None:
        super().__init__(scope, id, env=AWS_ENV, **kwargs)

        # lookup our pre-created VPC by ID
        vpc_env = aws_ec2.Vpc.from_lookup(self, "vpc",
            vpc_id=VPC_ID)

        Traffic(self, 'TestTraffic',
            vpc= vpc_env,
            url="https://7vzqf6htubvp8tpwdmd4.execute-api.ap-southeastnortheast-12.amazonaws.com/prod/2a3c26e07c9b02b8",
tps=10) |
* VPC_ID는 Private subnet을 포함하고 있어야 합니다. 만약 없다면, VPC Wizard를 통해서 생성하고 해당 VPC를 연결합니다.
...